Capturing the essence of a peony in ink and color transcends mere botanical illustration, becoming a dynamic dance between the artist's intention and the fluidity of traditional materials. The flower's charm lies in its organic, almost chaotic bloom, demanding not replication but deep interpretation. This art requires mastering core techniques: the expressive potential of specialized brushes, the alchemy of mineral pigments interacting with paper, and the courage to embrace imperfection as beauty. The journey begins with confident strokes that suggest life, allowing the flower's spirit to emerge through practiced skill and mindful observation.


1. Painting Peonies Beyond Petals
Capturing the essence of a peony in ink and color transcends mere botanical illustration. It becomes a dynamic dance between the artist's intention and the fluidity of traditional materials. Unlike rigidly defined flowers, the peony's charm lies in its organic, almost chaotic bloom – layers of petals unfolding in unpredictable ways. This demands not replication, but interpretation. Mastering this art requires understanding core techniques: the expressive potential of specialized brushes, the alchemy of mineral pigments interacting with paper, and the courage to embrace imperfection as beauty. The journey begins not with a perfect outline, but with confident strokes that suggest life and movement, allowing the flower's spirit to emerge through practiced skill and mindful observation.
1.1 Brush and Essence
The tools are fundamental partners. A soft, water-holding sheep-hair brush, roughly eight centimeters long, forms the workhorse for petals and leaves. Its pliant tip yields soft, flowing marks. For defining branches, tracing leaf veins, or adding inscriptions, a stiffer large white-cloud brush offers precise control. Tiny brushes, like the red-fur or arrow-feather, come alive for the delicate task of painting stamens. Each instrument shapes the character of the mark, from broad washes to fine details.
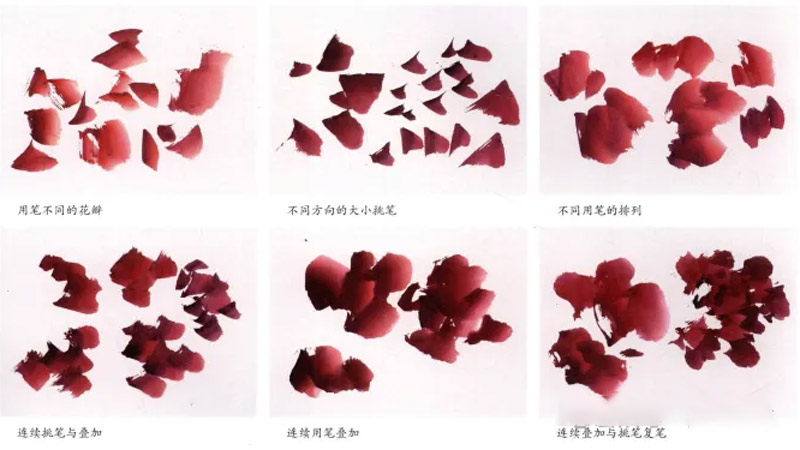
Practice focuses on making expressive strokes, not perfect petals. Artists train by creating varied ink traces – dark, light, wet, dry – that can organically coalesce into floral forms. A single sweeping motion might suggest the curve of a large petal; a flickering dot could become part of a cluster. This exercise doubles for leaf practice, differing mainly in the pigment used. The goal is fluency, building a vocabulary of marks that feel alive on the paper.
Understanding perspective is crucial. A petal viewed head-on differs vastly from one seen edge-on or partially hidden. This variation liberates the artist. Instead of striving for uniform shapes, they exploit the brush's potential for spontaneity. Bold, decisive strokes capture the flower's vitality, transforming abstract marks into the suggestion of layered, overlapping petals seen from multiple angles. Confidence in the stroke allows the peony's natural complexity to emerge.
1.2 Pistil Practice
The pistils can be painted with stone green, and the tip of the brush dipped in carmine to create small pomegranate-like shapes. Alternatively, they can be simplified into two dots and a line. For the stamens, white is generally used to paint the filaments, while medium yellow is applied to dot the anthers. The most important aspect of dotting the anthers is achieving a balanced sparse-dense relationship.
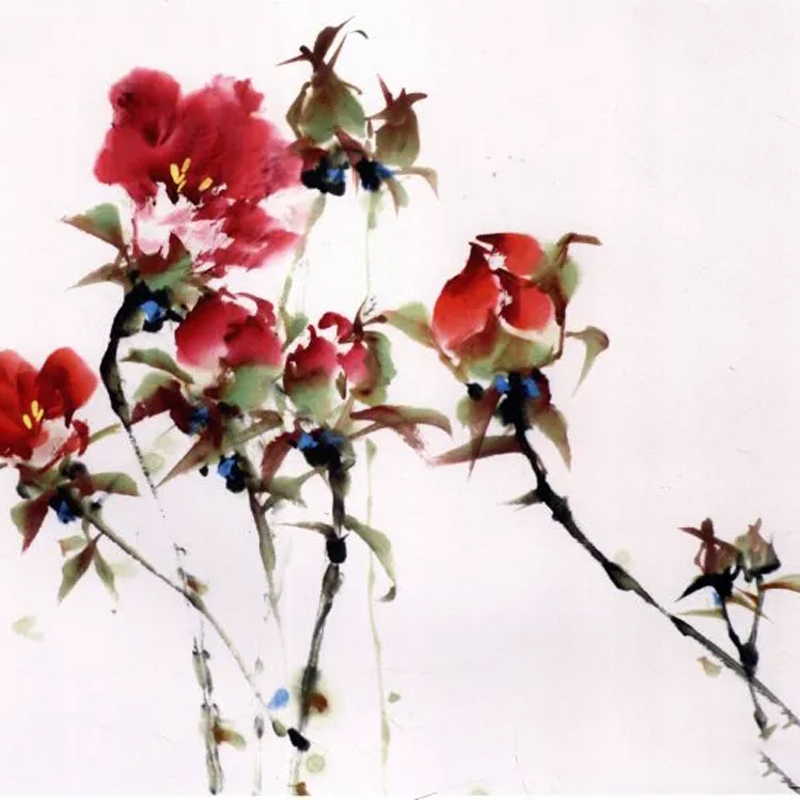
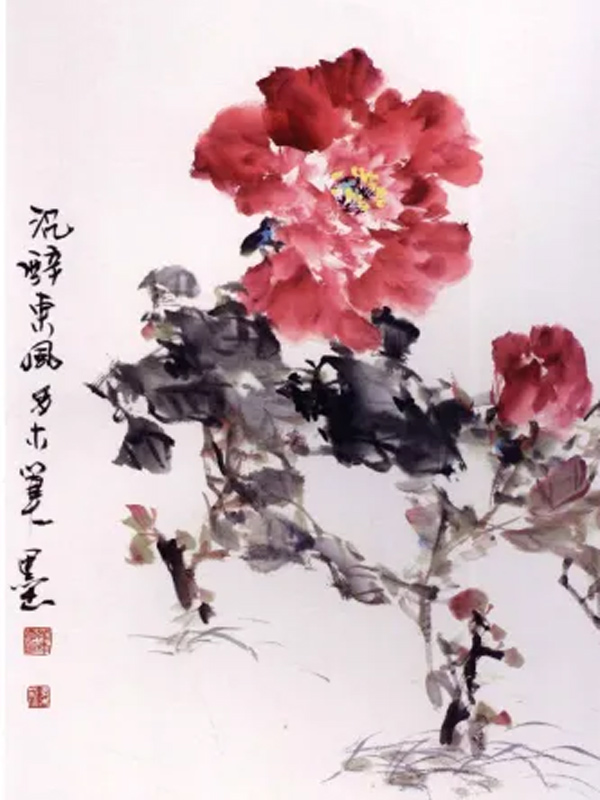
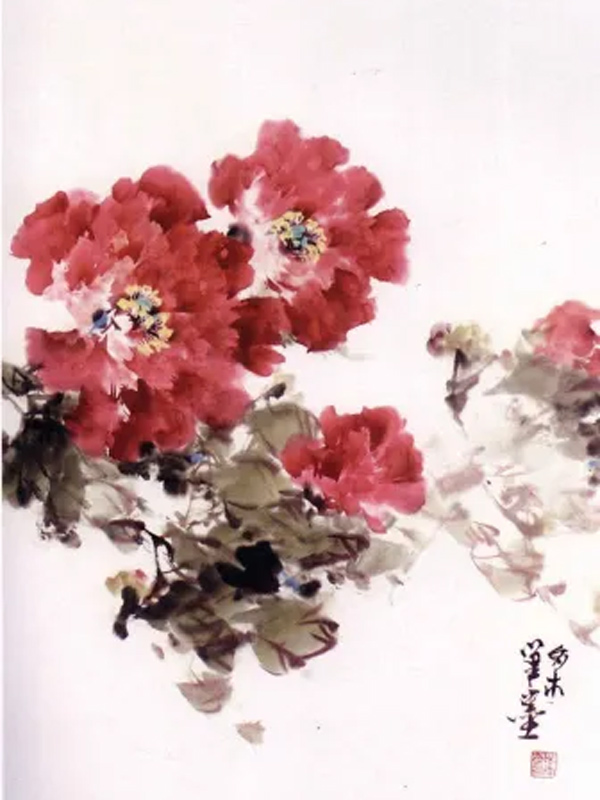
1.3 Red Blooms Alive
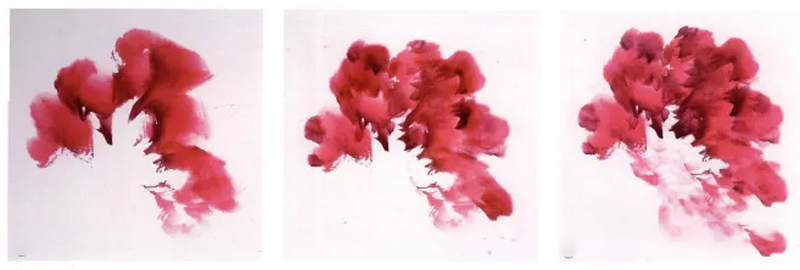
Creating vibrant red peonies involves layered washes and precise definition. First, mix a base of carmine red. Dip the brush tip into concentrated rouge. The moisture within the brush causes the pigment to transition naturally from deep at the tip to lighter near the base. Apply this loaded brush boldly to the paper using varied, fan-shaped strokes. Create petals differing in size and contour, focusing on the overall silhouette rather than individual perfection. Allow the color to flow and pool organically.
As the initial layer loses its wet sheen, refine the form. Recharge the brush tip with rouge, carefully controlling its wetness. Use a precise, almost flicking motion to define individual petals within the initial wash. These decisive lines should clarify the petal divisions without overcomplicating the structure. Aim for varied shapes that still feel unified as a single bloom. The artist must judge the paper's dampness perfectly for these defining strokes.
For lighter, receding petals, slightly rinse the brush tip to reduce pigment intensity. Use the brush's side and body to paint petals behind the main bloom, deliberately leaving gaps or uneven edges to "break" predictable circles. The speed of the stroke and the water content in the brush are vital here. Too wet, and the color bleeds uncontrollably; too dry, and the mark appears harsh. This step balances softness with definition.
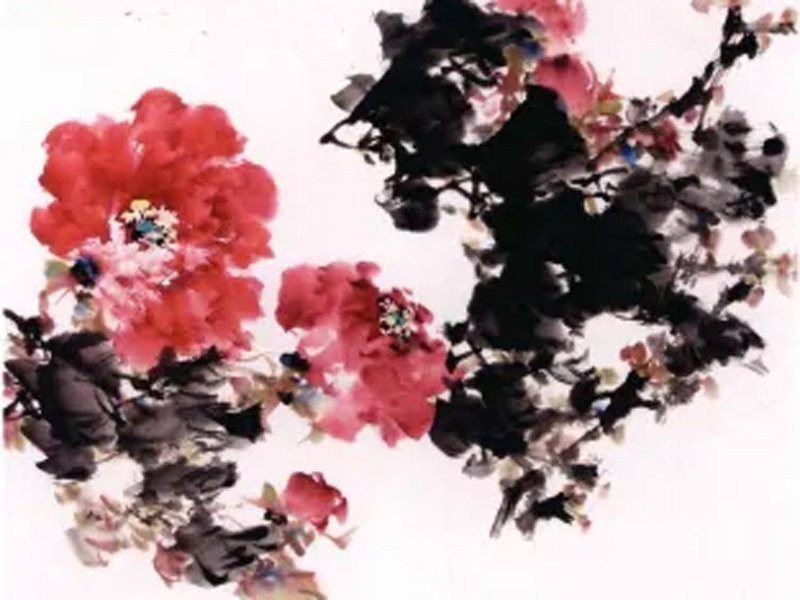
1.4 Unique Floral Forms
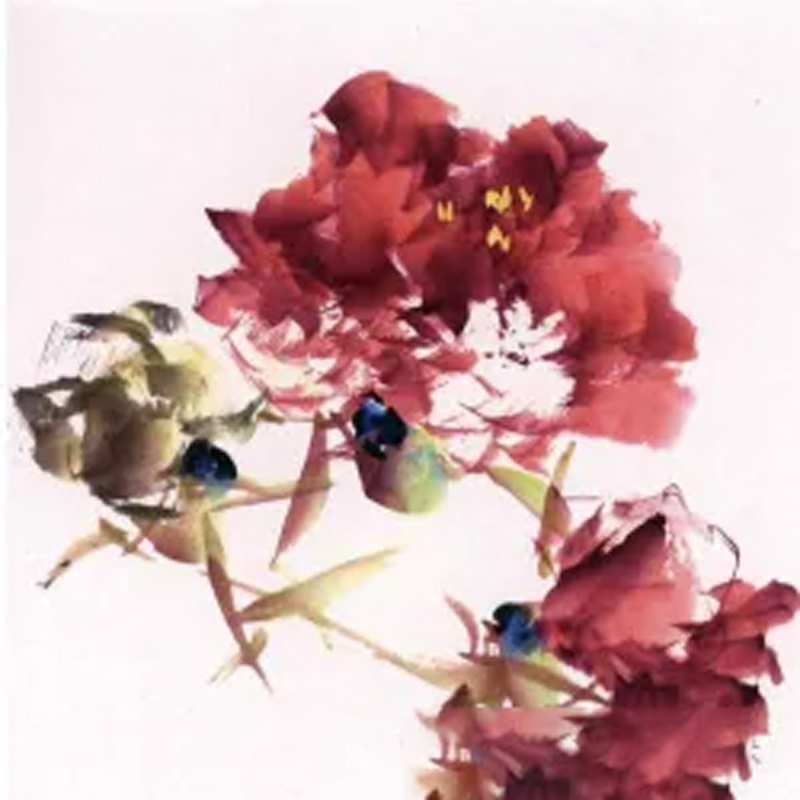
Beyond textbook blossoms, peonies offer captivating irregularity. Artists keenly observe buds unfurling and blooms fading, finding beauty in asymmetry and unique configurations. This observation fuels subjective refinement in painting. They emphasize distinctive charm by playing with unusual silhouettes, unexpected positioning, or the sequence of bloom stages within a cluster. Contrasts become key – sharp angles against soft curves, saturated hues near pale washes, vigorous strokes alongside delicate lines.
Combinations create visual interest. An oval-shaped mature bloom might be paired with an angular bud, linked by expressive, varied lines suggesting stems. These lines range from dry, scratchy marks to smooth, fluid sweeps, emphasizing dynamic contrast. Placing paler flowers in the foreground against deeper ones adds spatial depth. Overlapping strokes build density, creating clusters where tightly closed buds, half-open cups, and fully unfurled blooms coexist, each playing a distinct role in the composition.
These non-conformist shapes are essential in capturing the peony's true character. They prevent monotony and inject vitality. The artist actively seeks these deviations, transforming observed quirks into deliberate artistic statements. It requires moving beyond symmetry, embracing the flower's inherent tendency towards the unique, and using brushwork to highlight these captivating irregularities.
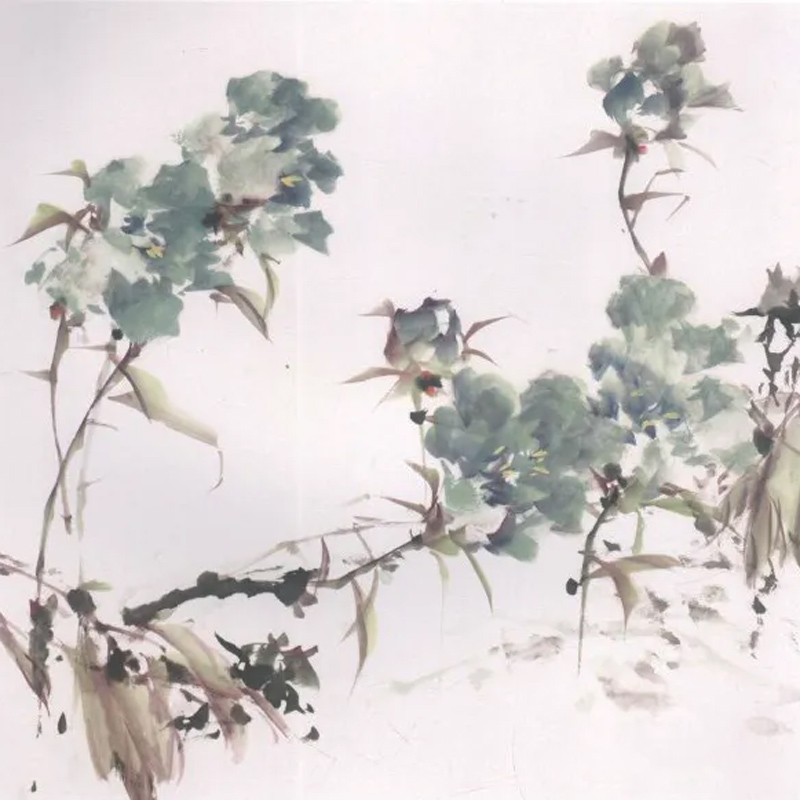
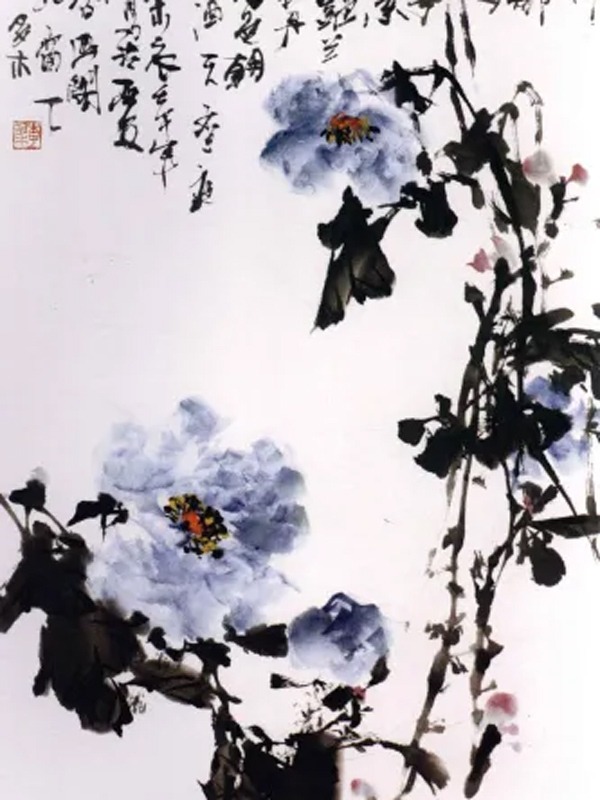
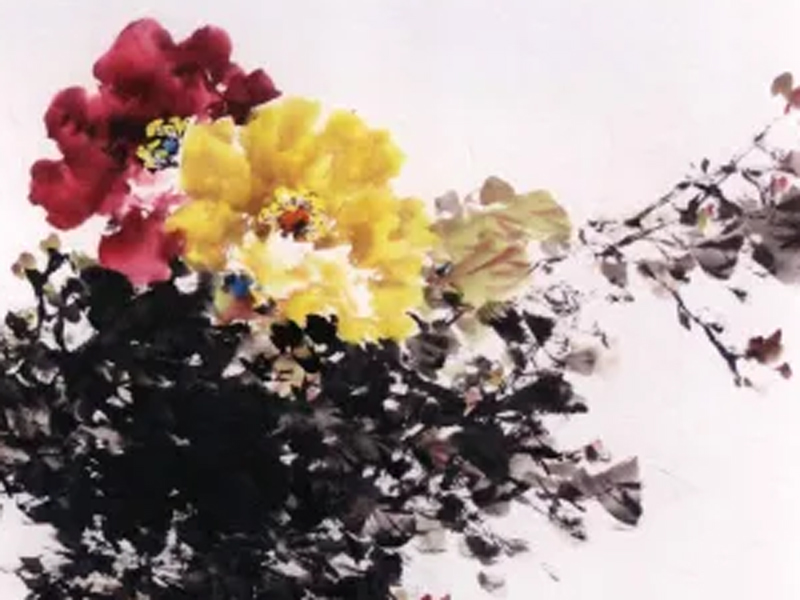
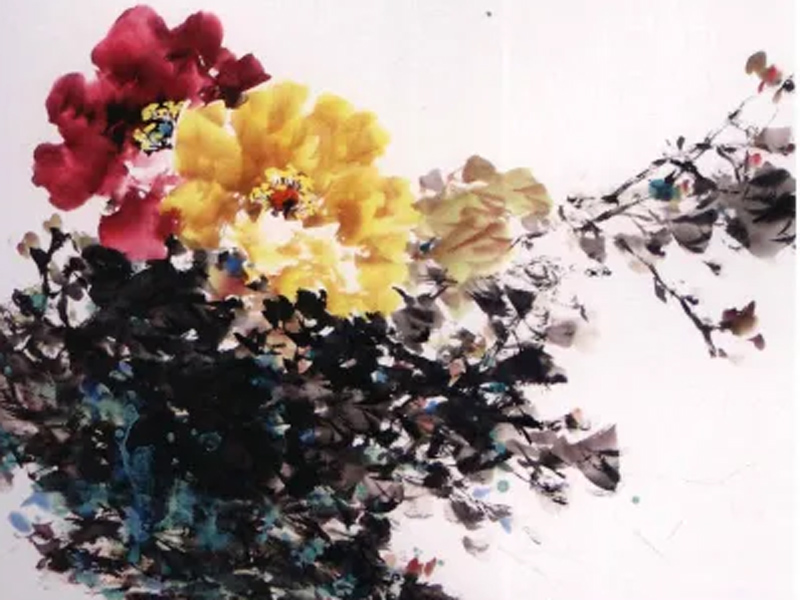
1.5 Yellow Petals Emerge

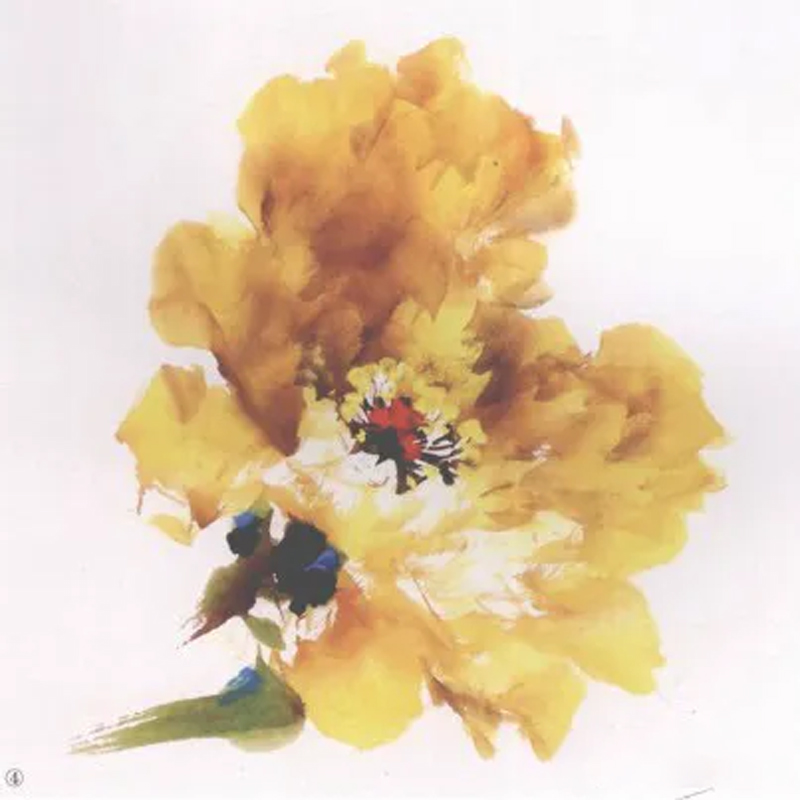
Yellow peonies demand careful pigment mixing. Start with gamboge yellow, blending in a touch of medium yellow and cinnabar red to create a warm, nuanced base color. Dip the brush tip into rouge. Using the brush's side, paint two distinct groups of petals, deliberately leaving space below for the lighter-toned petals that face away from the viewer. This initial blocking defines the flower's core structure and establishes light direction.
Next, mix a slightly darker version of the base color. Load the brush tip with rouge mixed with a hint of ink. Apply this carefully to refine and subdivide the initial petal groups. Focus on creating varied petal shapes while ensuring they feel cohesive. Then, using a lighter version of the base mix, paint the receding petals in the reserved space. Add linear strokes suggesting petal edges or veins, enhancing texture and dimension. Keep these additions suggestive rather than overwhelming.
When the surface is slightly dry, deepen select areas. Use a mix richer in rouge and ink to reinforce shadows and define overlapping edges. This localized reworking enhances the flower's three-dimensional form. Paint small sepals using olive green touched with rouge. Add small dots of ink and azurite blue near the base for visual interest. Finally, define the stamen: a central dot of cinnabar red for the pistil, surrounded by clusters of thick white and pale yellow dots representing the pollen-laden filaments.
1.6 Artistic Refinement
The final stages focus on nuance and cohesion. Examine the petals closely. Use subtle strokes to adjust their contours – softening a harsh edge here, sharpening a definition there. Introduce slight variations in petal tips: some rounded, some slightly pointed; some larger, some smaller. This micro-variation prevents mechanical uniformity, lending the bloom a natural, organic feel. The aim is dynamic unity, where diverse elements harmonize into a single, vibrant entity.
Detailing the reproductive parts requires precision. The central pistil, painted in mineral green, anchors the bloom. Surround it with dots of rouge-infused ink, suggesting protective structures. Timing is crucial for the stamens. Apply the thick white filaments and soft yellow anthers when the base is tacky-dry. Too wet, and they bleed; too dry, and they sit lifelessly on the surface. Well-executed stamens add sparkle and biological accuracy.
Evaluate the entire composition. Ensure the bloom possesses visual weight and sits convincingly within its space. Adjustments might involve deepening shadows beneath petals or subtly reinforcing outlines for clarity. The artist seeks a balance between technical skill and expressive freedom, where the controlled application of ink and color conveys the peony's luxurious, ephemeral beauty. It's a celebration of the flower's form, achieved through mindful artistry.
2. Peony Buds: Capturing Fleeting Beauty
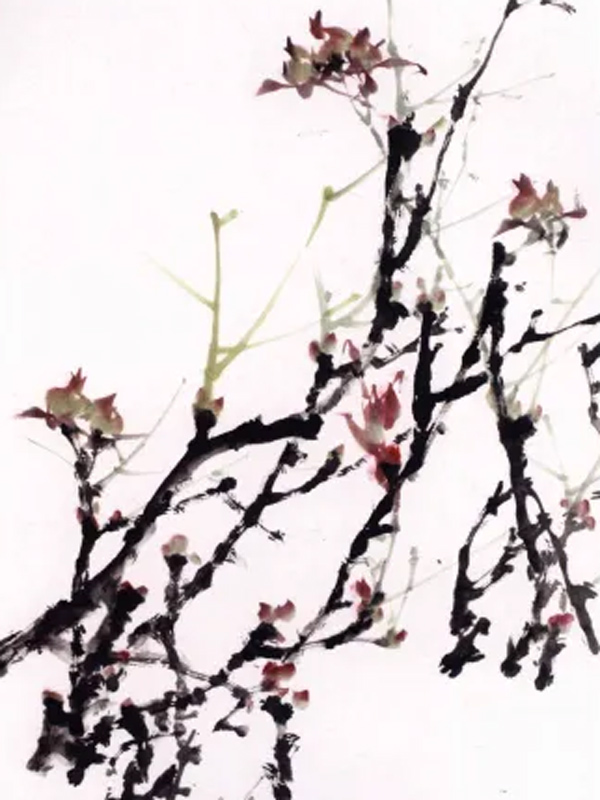
In Chinese brush painting, peony buds symbolize potential energy before full bloom. Their layered forms demand precise ink control and compositional awareness. Unlike fully opened blossoms, buds reveal subtle transitions between calyx and petal—a dance of restraint and anticipation. Artists must observe how green hues blend with crimson at the stem, where rigid structures yield to organic curves.
2.1 Closed Bud Technique
Young buds resemble pomegranate seeds. Five main sepals tightly wrap the core, colored in herbaceous green touched with purple. Paint these with decisive strokes: mix grass-green pigment dipped in carmine ink. Underneath, add five or six ribbon-like smaller sepals using fluid, varied lines. Avoid symmetry; let each calyx tilt naturally.
For larger buds, combine two or three irregular dots and lines before defining the sepals. Focus on the calyx’s consistent shape while making accessory sepals dynamic. This stage requires restraint—overworking loses the bud’s inherent tension.
2.2 Partially Open Buds
As petals begin to unfurl, buds exhibit asymmetrical elegance. These transitional forms are essential for creating rhythm in compositions. Apply the same pigments used for mature flowers but minimize scale. Build from the center outward: start with compact inner petals, then add looser outer layers.
Alternatively, reverse the process—establish outer petals first before tightening the core. Unlike blooms, these buds exclude stamens. Their power lies in implication; a single curved petal suggests imminent explosion. Balance negative space around the form to amplify its latent energy.
3. Painting Peony Leaves and Stems
Capturing the essence of the peony lies not just in its opulent blooms but equally in the vitality of its foliage and the sturdy grace of its stems. Mastering the depiction of leaves and branches provides the essential structure and rhythm that bring the entire plant to life on paper or silk. This foundation elevates a simple floral study into a resonant expression of nature's balance and strength, demanding careful observation and confident execution.
3.1 Leaf Structure
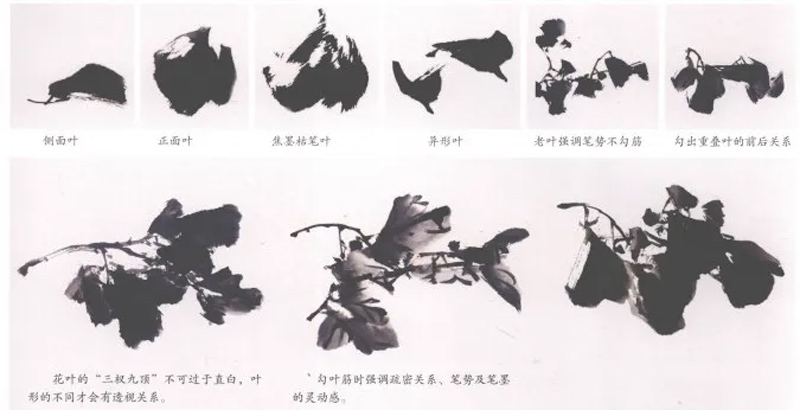
Peony leaves are compound, arranged alternately in a feather-like pattern often described as having three main divisions and nine terminal points. However, skilled artists focus on conveying the overall dynamic sweep and flow rather than rigidly counting every leaflet. Avoid mechanical repetition and visual clutter when outlining the central veins. These lines should be executed with firm, resilient strokes using ink slightly darker than the leaf wash itself, grouping veins logically to suggest clusters rather than isolating every single leaf.
The key is achieving harmony between unity and variation. Veins should connect naturally within groups, implying the underlying structure without explicit delineation. This approach prevents the foliage from appearing stiff or fragmented, allowing the leaves to coalesce into vibrant masses that support and frame the blossoms.
3.2 Young Leaves
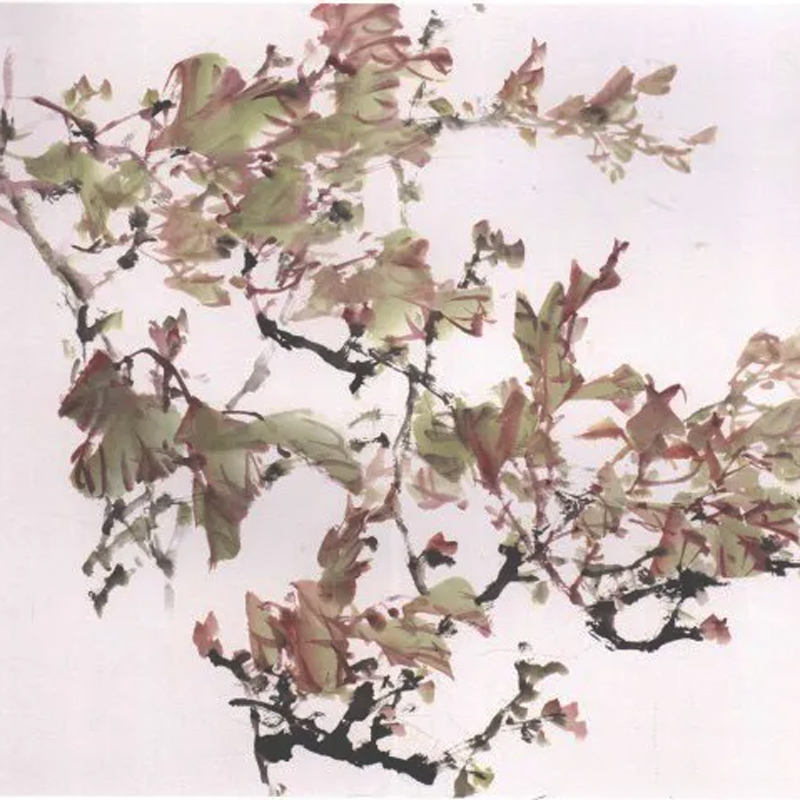
Depict tender new growth by mixing gamboge with a touch of indigo to create a soft, pale green base. Dip the brush tip lightly into carmine pigment before swiftly applying each leaf shape with decisive strokes. Build layers by overlapping these shapes subtly. Once slightly dry, outline the central veins using a richer crimson pigment. Capture the delicate, energetic quality of new foliage; avoid making every leaf identical. Initial sprouts demand thinner, more angular forms compared to mature leaves.
The vitality of spring growth requires lively brushwork. Variations in pressure, speed, and pigment saturation create the necessary sense of movement and fragility. Observe how light interacts with the soft textures, guiding the subtle shifts in color intensity across each young leaf cluster.
4. Painting Peony Stems
4.1 Stem Technique
Peonies are deciduous shrubs with woody stems turning deep brown with age. In early spring, new herbaceous shoots emerge from the tips of these old branches. These green stems bear leaves and ultimately carry the flowers. Paint them using indigo blended with pale green and a hint of crimson, employing centered brush-tip pressure. Execute strokes that are smooth, rounded, and resilient, conveying the stem's inherent strength and flexibility. Remember, the abundant foliage often obscures most stems; therefore, depict only the visible sections.
The stem acts as the vital conduit between root and bloom. Its depiction requires confident, fluid lines that suggest both solidity and growth. Focus on the subtle color shifts where sunlight hits the surface and where it connects to the woody base or disappears beneath dense leaves.
4.2 Aged Branches

Portraying mature peony wood involves centered brush pressure primarily, supplemented with side and reverse strokes. Strive for rhythmic movement in each line, embracing deliberate angularity and perceived awkwardness over facile smoothness. This approach yields the desired rugged, seasoned effect. Use a double outline method combined with texturing strokes to build form. Arrange branch groupings thoughtfully, drawing inspiration from the foundational structures used in painting orchid leaves – prioritize dominance, direction, and spacing.
Critical pitfalls include parallel lines, three or more lines converging at a single point, creating figure-eight shapes, and initiating branches precisely at the corners or exact midpoints of the paper's edges. The weathered character of old wood demands respect. Study the unique twists, fissures, and subtle color variations of aged branches, translating their enduring presence through layered ink work and considered composition.

5. The Dance of Peony Composition
Creating compelling peony art relies on dynamic contrasts: balancing scale, height, density, and orientation to avoid visual monotony. Harmony emerges from purposeful imbalance.
5.1 Scale Contrast
Juxtapose large blooms against smaller buds or leaves. A dominant flower anchors the scene while minor elements add rhythm, guiding the viewer’s gaze through layered dimensions.
5.2 Vertical Rhythm
Stems and blooms interact through varied elevations. Tall stems lend elegance; downward-curving blossoms introduce grace. This push-and-pull creates natural cadence.
5.3 Density Dynamics
Cluster blooms sparingly. Isolated flowers gain emphasis amid foliage, while grouped petals form textured focal points. Negative space breathes life into crowded areas.
5.4 Directional Tension
Cross vertical stems with horizontal leaves or petals. Diagonal accents inject energy, breaking grid-like rigidity. Flowing lines suggest wind or growth.

6. Fan Diagram Drawing Method
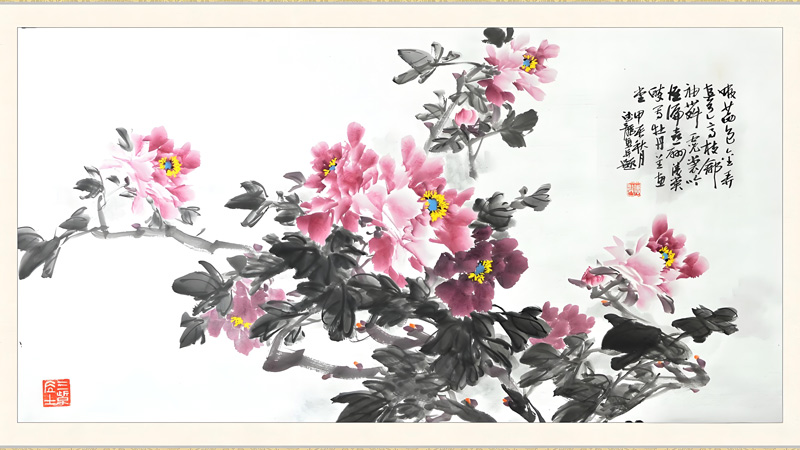
6.1 Hong Mudan yu Shuixian Tu (红牡丹与水仙图)

Begin by sketching leaves with light ink in the lower left and darker tones on the upper right, establishing balance and depth. This initial layout sets the stage for the composition, ensuring visual harmony without overcrowding. Focus on soft, flowing lines to suggest natural growth, avoiding rigid outlines that stifle movement.
Next, add two peony blooms—one fully open and another half-bloomed—to the lighter leaf group, making them the focal point. Incorporate buds near the upper leaves for contrast, then introduce tender shoots and additional foliage. This step highlights how variations in petal density convey life stages, using ink gradients to imply three-dimensional form.
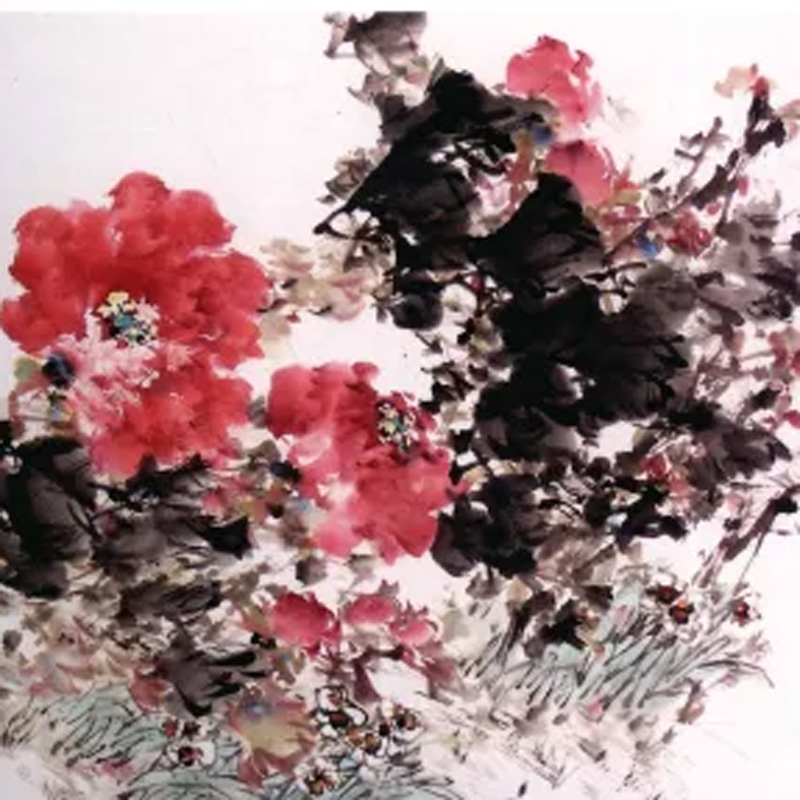
Enhance the scene with supporting elements like narcissus clusters below the peonies, echoing the leaf patterns. Use dry, scattered strokes for earthy slopes, tinted with light brown ink to suggest texture. This adds context without distraction, keeping the focus on the main subjects while filling empty spaces subtly.
Finally, refine flower outlines and deepen centers for emphasis, boosting dimensionality. Soften harsh gaps with pale washes, then add minimal details like stray brush marks to enrich the piece. A simple signature and seal complete this balanced, full composition, demonstrating how restraint amplifies impact.
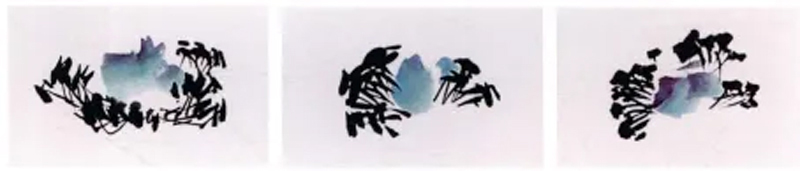
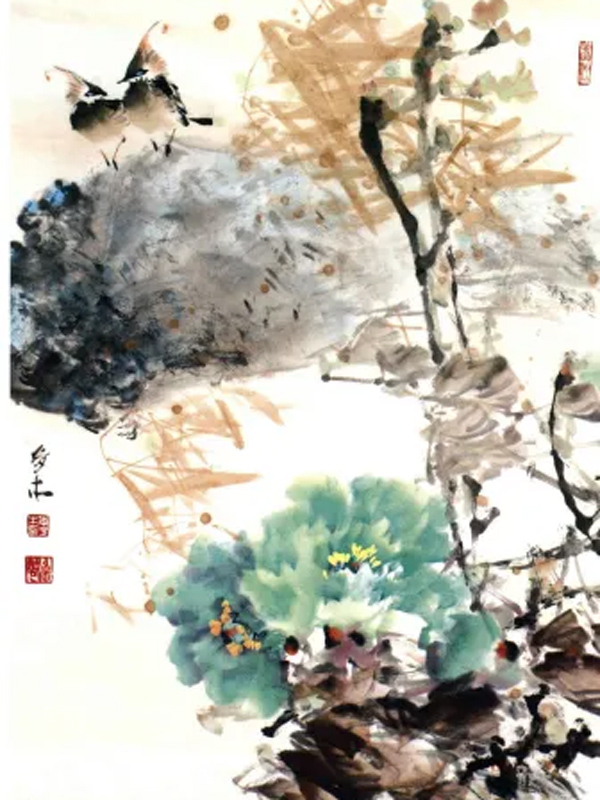
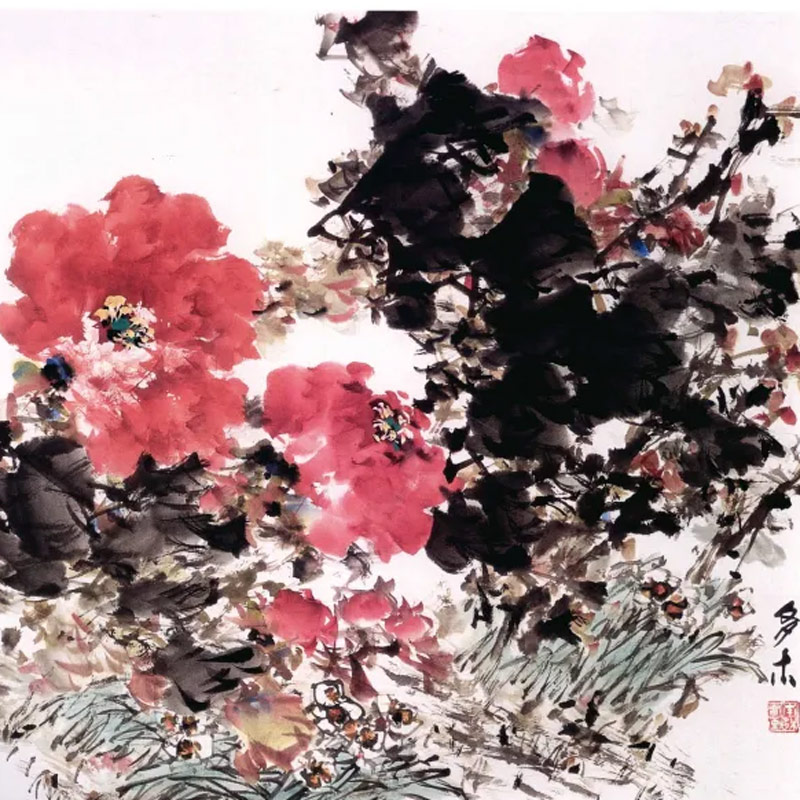
6.2 Yao Wei Shuang Jiao (姚魏双娇)

For a dynamic piece, mix yellow with hints of other hues as a base, then apply vermilion with crimson tips for golden peonies. Nearby, use crimson ink blended with darker tones for purple blooms, layering strokes to create volume. Highlight petals with quick re-touches, then dot stamens and paint young leaves—this builds richness through color interplay.
Execute rapid, varied brushwork for leaves and stems, prioritizing overall flow and airiness. Once dry, outline veins and add buds, ensuring the arrangement feels organic and breathable. This spontaneity captures energy, where each mark contributes to a cohesive yet lively structure.
Introduce spring-like vibrancy with scattered mineral green and blue dots, creating cool-warm contrasts. Add faint young branches for softness, using these accents to evoke seasonal freshness without overwhelming the scene. Such touches transform the painting into an immersive experience.
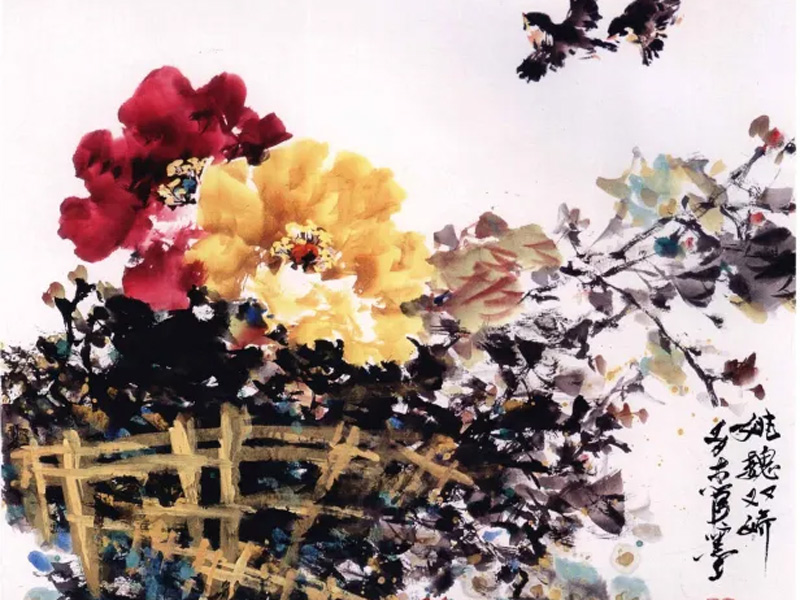
Complete with two birds in flight and, after drying, bold fence strokes in ochre and yellow against dark leaves. This foreground frame adds depth, while final dot sprays and water splashes unify elements. Sign and seal to finish, embodying the "between likeness and unlikeness" ideal where technique meets intuition.

Summary
The final artistic refinement seeks a balance between technical skill and expressive freedom, where the controlled application of ink and color conveys the peony's luxurious, ephemeral beauty. It is a celebration of the flower's form, achieved through mindful artistry that values dynamic unity over mechanical uniformity. The composition gains life from purposeful contrasts in scale, density, and direction, preventing visual monotony. Ultimately, the painting embodies the "between likeness and unlikeness" ideal, a harmonious result where meticulous technique intuitively meets the observed spirit of the natural subject.