Want to transform your ceramic plates from purely functional pieces into captivating works of art? Forget complicated jargon; mastering three fundamental acts unlocks stunning results. This guide shares core techniques even beginners can embrace, culminating in exclusive decoration inspiration. Discover how patience and these focused steps turn humble clay into gallery-worthy tableware.
Act 1: The Foundation - Mastering Form
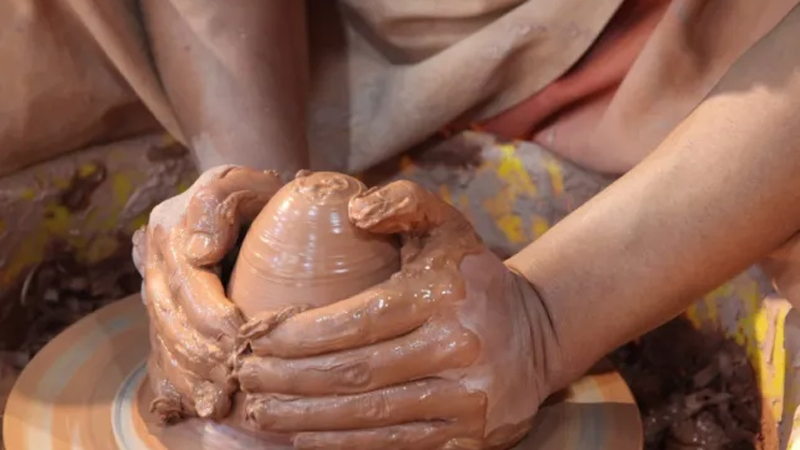
Every masterpiece begins with solid structure. For plates, achieving perfect centering is non-negotiable. Firmly place your kneaded clay on the wheel head. Use your palms to press it down securely, ensuring zero wobble as rotation begins. Beginners: practice only this step until the clay spins smoothly and obediently under your hands. This control is paramount.
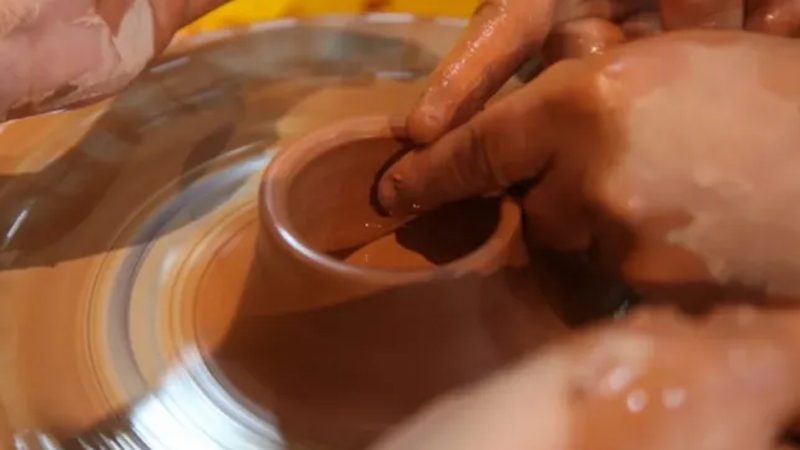
Raising the walls demands consistent, gentle pressure. Push your thumb vertically down into the centered clay to open it. Then, cradle the emerging form with both hands, thumbs outside and fingers inside. Using the fleshy base of your thumbs (near the web ), steadily coax the clay upwards. Too little pressure yields a lopsided wall; too much causes collapse. Imagine cradling a fragile bloom, encouraging it to open.
A stable base ensures your creation "stands." Maintain a thickness of 5-8mm at the bottom for durability. While the rim can be slightly thinner, avoid sharp angles. Before proceeding, gently smooth the surface with a damp sponge, creating curves as fluid as river stones. This refined shape sets the stage for decoration.
Act 2: Creative Expression - Texture & Embellishment
Once the leather-hard stage arrives (firm but slightly cool), surface design breathes personality into the plate. Carving offers precise detail. Use a sharp needle tool or knife to incise lines, patterns, or natural motifs like leaf veins. Aim for depths between 0.5-1mm – too shallow risks disappearing in the kiln; too deep invites cracks. Confidence in each stroke creates clean definition.
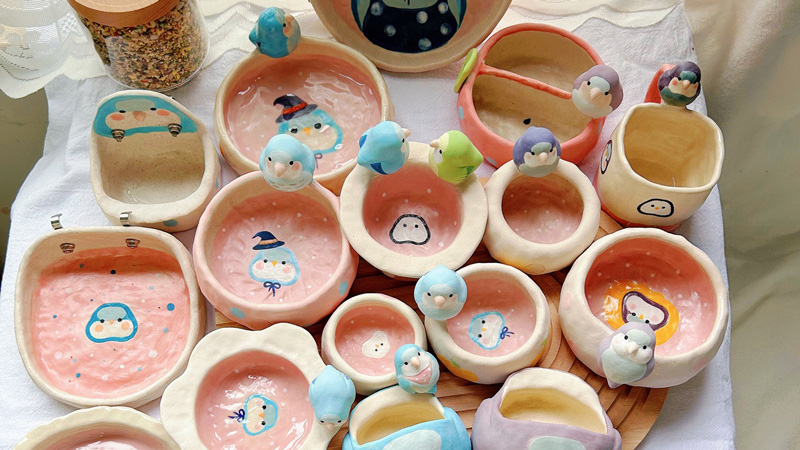
Add dimension with applique. Roll small clay pieces into delicate coils for elegant rims, or sculpt miniature flowers and leaves. Before attaching, lightly score both the plate surface and the back of your decoration, then apply a touch of water or slip (clay slurry) as adhesive. Press firmly to bond the pieces, ensuring no air pockets remain trapped underneath. This tactile approach builds layers of interest.
Introduce light and shadow with piercing. Carefully cut small holes or shapes (moons, stars, geometric patterns) into the plate wall or base using specialized hollowing tools. Prioritize symmetry and structural integrity; excessive or poorly placed openings can weaken the piece. This technique transforms solid form into delicate lacework.
Act 3: The Grand Finale - Glaze Alchemy
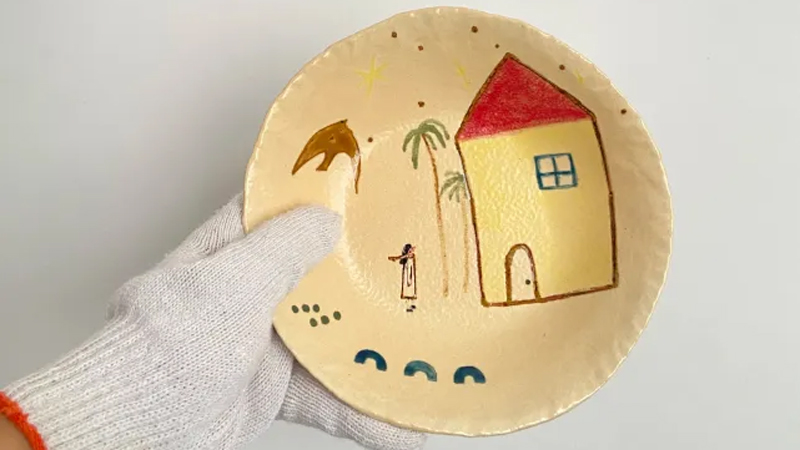
Glaze application is where science meets artistry. Monochromatic gradients offer sophisticated simplicity. Choose one color family and apply it progressively, deepening from the center outward or vice versa. This subtle shift creates depth and suits modern aesthetics perfectly.
For vibrant energy, embrace complementary contrasts. Pair opposites like yellow and purple or blue and orange. Apply one as the dominant background (covering ~70% of the surface) and use the other for focused accents – perhaps painting floral details at the center or highlighting the rim. This calculated imbalance creates visual pop.
Explore special effects for unique character. Yao bian (窑变) glazes morph unpredictably in the kiln, producing mesmerizing, fluid patterns. Crystal glazes develop sparkling crystalline formations during firing. These require practice; test small areas first to understand how specific kiln temperatures interact with the glaze chemistry. Patience reveals stunning surprises.
Remember: After the initial bisque firing, lightly sand the surface with fine-grit paper to remove any roughness. This ensures a flawlessly smooth finish under the glaze. Always consider function: plates meant for food should minimize raised textures for easy cleaning, while purely decorative wall pieces offer freedom for bold, sculptural additions.
Ready to shape your own story in clay? Each plate becomes a tangible record of your focus and creativity. Whether destined for daily meals or gifted as a heartfelt token, it carries a unique signature – your vision made solid.